
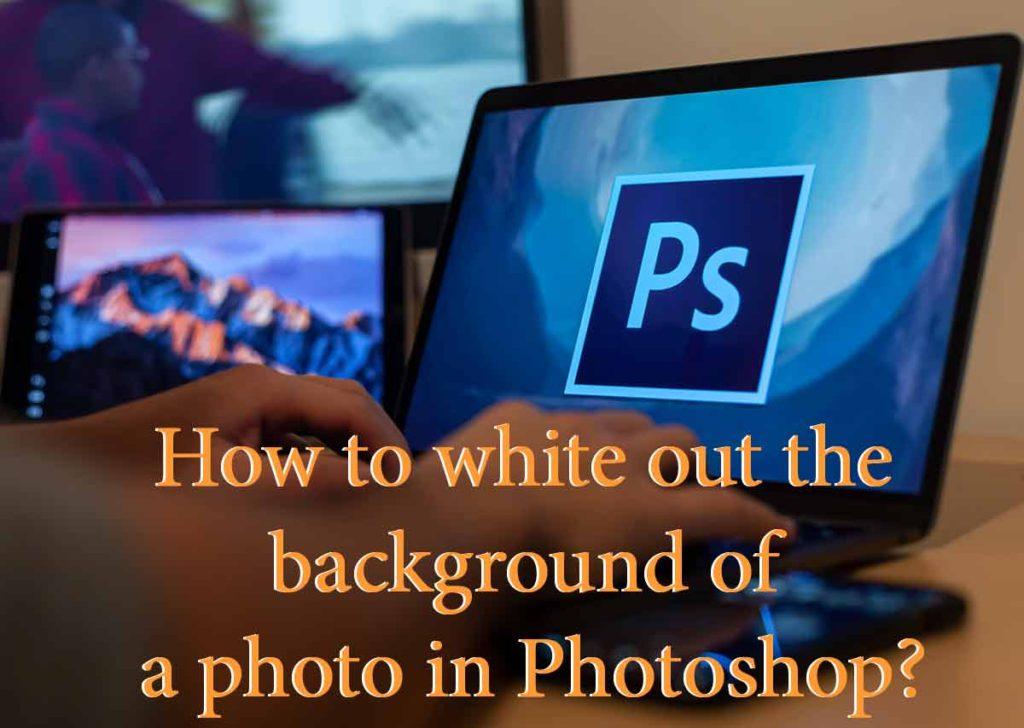
Welcome to our guide on how to remove whiteout background of photo! In this guide we discuss some tips on how to transparent background tutorial, we’ll take you through the process of a photo lighting editing and photo brightness editor to create transparent backgrounds of your images using Photoshop and iPhone photo cut out like a pro or clipping path editor, clipping path service company!
Are you tired of bland, boring photos with cluttered backgrounds? Do you want to make your subject stand out and bring your photos to life?
Look no further! With our whiteout background of photo tutorial, you will learn how to remove distracting backgrounds and create a clean and professional look for your images.
Whether you’re using an iPhone or relying on our clipping path expert tips, you’ll be amazed at how easy it is to transform your photos.
So what are you waiting for? Get started on your photo editing journey today!
For those looking to take their photo editing skills to the next level, there are advanced techniques for whiteout background of photo that can be utilized in Photoshop.
One such technique is the use of layer masks, which enable you to selectively hide or reveal parts of a layer for a more precise whiteout effect.
Another technique is the use of clipping masks, which allow you to mask one layer with another, providing even more control over the final result.
With these advanced techniques, you’ll be able to produce high-quality, professional-looking images that truly stand out.
So, whether you’re a professional photographer or just looking to improve your personal photos, these techniques are sure to take your whiteout background skills to the next level.
There are several advanced techniques for whiteout background of photo in Photoshop:
By using these advanced techniques everyone can change the background of a photo with Adobe Photoshop’s latest updated software, you can create high-quality, professional-looking images with whiteout backgrounds.
So if you’re looking to improve your photo editing skills, give these techniques a try and see what you can create!
To make whiteout background of photo or remove white background from our photos requires proper lighting, camera settings, and post-processing techniques.
To achieve for remove background of white color, use soft, diffuse light to reduce shadows and set your camera to a high aperture setting.
Choose a solid, bright white background color and make sure the image is large enough to allow for cropping. In post-processing, use image editing software to clean up the background and remove any imperfections.
Here are some tips for achieving to remove white background in your photos:
Lighting: Proper lighting is key to achieving whiteout background of photo or remove background of white color. Use soft, diffuse light to reduce shadows and ensure that your background is evenly lit.
Camera Settings: Set your camera to a high aperture setting, such as f/8 or f/11, to create a shallow depth of field and blur the background. This will help us to achieve whiteout background of photo, as the background will not be in focus.
Background Color: Choose a background that is a solid, bright white color. This will help to ensure that the whiteout background of photo free from shadows or other distractions.
By following these tips, we can achieve whiteout background of photo, giving your subjects the attention they deserve.
To whiteout the background of a photo on an iPhone, open the Photos app and select the photo. Tap the Edit button, select the Crop and Rotate tool, and use your finger to trace around the subject, separating it from the background.
Adjust brightness and contrast to make a whiteout background of photo, then tap “Save” to keep the changes. Also here are the steps to whiteout background of photo on an iPhone:
These steps should help you to achieve whiteout background of photo for our projects using only your iPhone.
There are several tools for whiteout backgrounds of photos, including Adobe Photoshop, GIMP, Canva, Fotor, and Clipping Magic.
Choose the right tool for you depending on your needs and skill level, from the industry standard Photoshop to the easy-to-use online options like Canva and Fotor.
5 tools are available for whiteout backgrounds of photos, both paid and free. Here are some of the best options:
These tools can be used to achieve a remove background from our photos, and choosing the right one for us and will depend on our specific needs and level of skill.
But in most cases, if we need professional and pixel-perfect result according to our customize requirement we can hire and take helps from a commercial image editing service provider company.
Whiteout background of photos are crucial for e-commerce businesses, as they improve product visibility, presentation, brand consistency, comparison, and SEO.
Use a white background for a clean and professional look to increase customer engagement and boost the success of your e-commerce business.
Here are some reasons why:
Increased Product Visibility: A whiteout background helps to draw attention to the product itself and removes any distractions from the background. This helps customers to focus on the product and better understand its features and benefits.
Improved Product Presentation: A white background gives the product a clean and modern look that appeals to customers and increases its perceived value.
Consistent Brand Image: Using a whiteout background for all product photos helps to create a consistent and recognizable brand image across all products and platforms.
Better Product Comparison: When multiple products are displayed on a white background, it becomes easier for customers to compare them and make an informed decision.
Improved SEO: Using a white background can also improve the SEO of your website by increasing the contrast and visibility of product images, making them easier to index and rank by search engines.
By using a white background for your e-commerce photos, you can improve the presentation and visibility of your products, create a consistent brand image, and increase the success of your e-commerce business.
Transparent backgrounds are an important aspect of digital graphics and design, offering numerous benefits to artists, designers, and creative.
The importance of transparent backgrounds lies in their ability to allow the objects or elements in the foreground to stand out, without being hindered by a distracting or competing background.
However, when creating transparent backgrounds, it is important to be aware of common mistakes and how to avoid them like as a clipping path expert.
One of the most popular and widely used software for creating transparent backgrounds is Adobe Photoshop, which offers a range of tools and features to help achieve the desired result.
Overall, transparent backgrounds are a valuable thing in the creative process, and with the right tools and techniques, they can be easily created to enhance the visual impact of any project.
Transparent backgrounds are a visual effect in digital graphics where the background is removed or made transparent, allowing the objects or elements in the foreground to stand out.
This is achieved by setting the opacity to zero or by remove background. Transparent backgrounds are widely used in graphic design, web design, and other creative fields.
Transparent backgrounds can have a significant impact on the overall appearance and functionality of images, graphics, and digital media. Here are some of the most important benefits of using transparent backgrounds:
Flexibility: Transparent backgrounds allow for greater flexibility in how images and graphics can be used. For example, a logo with a transparent background can be easily placed on top of different colored backgrounds without obscuring the background or affecting the overall look of the logo.
Layering: With transparent backgrounds, images and graphics can be easily layered on top of each other to create more complex designs. This is particularly useful for creating composite images, digital collages, and for combining images with text and other graphics.
Improved Visual Effect: Transparent backgrounds allow for images and graphics to blend seamlessly into the background, which can create a more polished and professional look.
Smaller File Sizes: Transparent backgrounds can result in smaller file sizes, making it easier to upload, download and share images and graphics, especially when they are used on websites or in presentations.
Improved Usability: Transparent backgrounds can improve the overall usability of images and graphics, making them more accessible and easier to use in a wide variety of contexts.
Overall, the use of transparent backgrounds in digital graphics is an essential tool for any creative professional, providing a wealth of benefits and opportunities for innovation and expression.
Transparent backgrounds can be used in a variety of situations where it is necessary to blend an image or graphic into its surroundings. Here are some common scenarios where transparent backgrounds can be particularly useful of daily a clipping path expert works:
Web Design: Transparent backgrounds are commonly used in web design to create graphics that blend seamlessly into the background of a website. This allows images and graphics to be positioned on top of different colored backgrounds or patterns, making them look more professional and integrated into the overall design.
Corporate or business Logos: Logos are often designed with transparent backgrounds so that they can be easily placed on a variety of surfaces, such as business cards, websites, and promotional materials.
Icon Design: Transparent backgrounds are often used in icon design to create icons that can be placed on top of different colored backgrounds without affecting their appearance.
Layered Images for combine: Transparent backgrounds are useful for creating layered images, such as digital collages, where multiple images are combined to create a single composition.
Presentations: Transparent backgrounds can be used in presentations to create graphics and diagrams that blend seamlessly into the presentation slides, making them look more professional and polished.
Photography and Image Editing: Transparent backgrounds are also useful for removing the background from photos, making it easier to isolate the subject and place it on a different background.
These are just a few of the many situations where transparent backgrounds can be useful. When used effectively, they can help to improve the overall look and functionality of digital media.
Transparent backgrounds are widely used by a variety of professionals and creative in different fields. Some of the most common users of transparent backgrounds include:
Graphic designers – who use transparent backgrounds to create logos, websites, packaging, and other design projects,.
Web designers – who use transparent backgrounds to create website elements such as buttons, icons, and images that can be easily integrated into any background or environment.
Advertising professionals – who use transparent backgrounds to create eye-catching and memorable advertisements that, can be easily applied to a variety of media and platforms,.
Branding specialists – who use transparent backgrounds to create logos and other elements that are consistent and recognizable across multiple platforms and media.
Photographers and artists – who use transparent backgrounds to create images that, can be easily composited over other backgrounds or elements, providing greater creative control and flexibility in their work.
Transparent and opaque backgrounds refer to the level of visibility of the background in an image. Transparent backgrounds have zero opacity, allowing anything behind the image to be visible.
On the other hand, opaque backgrounds have a solid color or image and are not transparent, completely covering anything behind them.
One of the key benefits of transparent backgrounds is that they provide greater flexibility and control in the creative process.
With a transparent background, images can be easily layered or composited over other backgrounds or elements, creating unique and visually appealing designs.
In contrast, opaque backgrounds can be limiting, as they fix the image to a specific background and do not allow for any layering or compositing.
In addition, transparent backgrounds are often preferred for web design and digital graphics, as they provide a cleaner and more professional look.
Opaque backgrounds can be more appropriate in certain situations, such as when a solid background color is required to complement the image or design.
Choosing the right image for a transparent background is an important factor in ensuring that your final design looks professional and polished.
There are several key considerations to keep in mind when selecting an image for a transparent background.
Firstly, the subject of the image should be well-defined and distinct from the background. This will make it easier to remove the background and create a clean, transparent background. Images with complex or busy backgrounds, such as those with a lot of patterns or multiple elements, are often more difficult to work with and may not result in a good final image.
Additionally, the image resolution should be high enough to ensure that the final image looks sharp and clear. Lower-resolution images may appear pixelated or blurry when used in larger designs or when the image is enlarged.
Another important consideration is the color palette of the image. If the image is being used as part of a larger design, it’s important to choose an image that has a color palette that complements the overall design. This will ensure that the final design looks harmonious and professional.
Finally, it’s important to consider the size and format of the image. Different image formats, such as JPEG, PNG, or GIF, each have their own benefits and limitations, so it’s important to choose the right format based on the specific requirements of your design. Additionally, the size of the image will impact the final design, so it’s important to choose an image that is the right size and scale for your needs.
here are the steps to create a transparent background using Photoshop software:
Open your image in Photoshop.
Select the “Magic Wand” tool from the toolbar on the left-hand side of the screen.
Click on the area of the image that you want to make transparent. This will create a selection around that area.
Once you have made your selection, press the “Delete” key on your keyboard. This will delete the selected area, making it transparent.
Save your image as a PNG file to preserve the transparency. To do this, go to “File” > “Save As” and select “PNG” from the dropdown menu.
That’s it! Your image now has a transparent background.
Improving the transparency of our background can have a significant impact on the overall look and feel of our design. Here are some tips for achieving a high-quality, transparent background:
Use the right tools: There are many tools available for removing backgrounds and creating transparent backgrounds. Photoshop is a popular option, but there are also many other options, such as online background removers and specialized software. Choose the right tool for our needs and skill level, and take the time to learn how to use it effectively.
Pay attention to detail: When removing the background from an image, it’s important to pay attention to detail. Make sure to remove any background elements or stray pixels that may affect the transparency of the final image.
Consider the color palette: The color palette of the image can also impact the transparency of the background.
Choose an image with a neutral color palette, or adjust the colors to create a transparent background that complements our design.
Adjust the opacity: Adjusting the opacity of the background can also help to improve its transparency.
Experiment with different opacity levels to find the right balance for our design.
Save in the right format: When saving our transparent background, choose the right file format. PNG is a popular choice for transparent backgrounds, as it supports transparency and is compatible with a wide range of software and devices.
By following these tips, we can improve the transparency of our background and create a high-quality, professional design. Whether we are creating a logo, website header, or any other type of design, a transparent background can make a significant difference in the final result.
Creating a transparent background can be a challenging task, and there are many common mistakes that can impact the final result.
Here are some of the most common mistakes to avoid when creating transparent backgrounds if we want to become a clipping path expert:
Not using the right tools: Using the wrong tool or not using it effectively can lead to poor results. Choose the right tool for our needs and take the time to learn how to use it properly.
Ignoring background elements: It’s important to pay close attention to detail when removing the background from an image. Ignoring background elements or stray pixels can negatively impact the transparency of the final image.
Not considering the color palette: The color palette of the image can also impact the transparency of the background. Choose an image with a neutral color palette, or adjust the colors to create a transparent background that complements our design.
Not adjusting the opacity: Adjusting the opacity of the background can help to improve its transparency. Don’t forget to experiment with different opacity levels to find the right balance for our design.
Saving in the wrong format: When saving our transparent background, choose the right file format. PNG is a popular choice for transparent backgrounds, as it supports transparency and is compatible with a wide range of software and devices.
By avoiding these common mistakes, we can create a high-quality, transparent background that will enhance our design.
Whether we are creating a logo, website header, or any other type of design, a transparent background can play a crucial role in achieving a professional, polished look.
IPhone Photo Cut Out involves removing the background of a photo to isolate the subject. This can be done through manual selection, masking, or using automated tools. The best tools will offer precision, accuracy, and ease of use.
The goal is to create a clean and professional cutout that highlights the subject. Regardless of the technique used, a high-quality cutout will make our photos stand out.
iPhone Photo Cut Out is the process of removing a photo’s background to isolate the subject. It can be done manually, using masks, or with automated tools. The goal is to produce a professional and accurate cutout that highlights the subject.
Techniques such as manual selection or masking offer precision, while automated tools simplify the process. The result is a high-quality cutout that transforms a photo into a standout piece.
iPhone Photo Cutting Tools offer a range of features to help our make the cut out process easier and more accurate.
Key features include precision selection tools, automatic background removal, and masking capabilities.
Some tools also offer adjustable edge smoothing, color correction, and other enhancements.
It’s important to choose a tool with the features that match our needs, such as precision for detailed work or automation for simplicity.
With the right tool, our iPhone Photo Cut Out process can be efficient and produce outstanding results.
iPhone Photo Cut Out provides several benefits for our visual projects. It allows us to isolate the subject of a photo and present it against a transparent background, making the subject stand out and drawing more attention.
This can be especially useful for graphic design, product photography, and other marketing materials. Additionally, having a transparent background gives us more freedom to choose the background color or image to complement the subject.
Overall, iPhone Photo Cut Out can elevate the visual appeal of our projects and help communicate our message more effectively.
iPhone Photo Cut Out can benefit a wide range of individuals and organizations. Photographers, graphic designers, and digital artists can use this tool to create professional and eye-catching visual content for our clients.
Businesses and marketers can also use iPhone Photo Cut Out to improve the composition of their promotional materials, making them more effective in communicating their message to our target audience.
Social media influencers and personal brands can also benefit from iPhone Photo Cut Out by creating visually appealing and engaging content for our followers.
In short, anyone who wants to create professional-quality images for their brand or personal projects can benefit from the use of iPhone Photo Cut Out.
Professional photographers can greatly benefit from the use of iPhone Photo Cut Out. This tool allows us to refine and enhance the composition of our images, making them more visually appealing and engaging.
With iPhone Photo Cut Out, we can remove distracting elements and adjust the background to make our subject stand out.
This can result in stronger, more impactful images that better showcase our skills and expertise.
In addition, iPhone Photo Cut Out saves time and effort compared to traditional photo editing methods, allowing us to focus on what really matters: capturing and creating stunning visual content for our clients.
Graphic designers can also greatly benefit from the use of iPhone Photo Cut Out. As part of our design process, we often require images with transparent backgrounds to incorporate into our designs.
iPhone Photo Cut Out makes it easy for us to achieve this, allowing us to quickly and accurately remove backgrounds and create images with transparent backgrounds.
This saves us time and effort, allowing us to focus on other aspects of our design work.
Furthermore, the ability to remove distracting elements and adjust the composition of images can also lead to more impactful and visually appealing designs that better represent our client’s brands and messages.
In short, iPhone Photo Cut Out is a valuable tool for graphic designers looking to streamline and improve their work processes.
Social media influencers can greatly benefit from iPhone Photo Cut Out. The ability to easily remove distracting elements and improve the composition of their photos can enhance the overall visual appeal of their content.
Additionally, having a transparent background can allow for greater flexibility in post-processing and marketing efforts. By using iPhone Photo Cut Out, our social media influencers can create visually stunning and professional-looking images to share with their followers.
Marketing professionals can benefit greatly from using iPhone Photo Cut Out. This tool enables them to create visually appealing images that can effectively promote their brand and products.
By removing distracting elements and improving the composition of photos, they can ensure that the focus remains on their message.
Furthermore, by having the ability to manipulate images, they can create unique and eye-catching visuals that can be used for advertising and marketing purposes.
With iPhone Photo Cut Out, marketing professionals can elevate our visual content and effectively reach their target audience.
An iPhone photo cutout is a process of removing the background of a photo, typically using photo editing software, to create a transparent or isolated image. There are several situations in which an iPhone photo cut-out can be useful:
Graphic Design: If you are working on a graphic design project, such as a logo or website design, using an isolated image allows you to easily place the subject on a different background or layer it with other elements.
Product Photography: Product photography often requires a clean, neutral background to ensure the focus remains on the product.
An iPhone photo cutout can help you achieve this by removing any distracting elements from the background.
Social Media: Transparent or isolated images are often used in social media posts, such as on Instagram or Pinterest, to create eye-catching and visually appealing posts.
Presentations: In presentations, an iPhone photo cutout can be used to emphasize a particular subject or to create a clean, professional look.
Personal Projects: You can also use an iPhone photo cutout for personal projects such as creating custom wallpapers, customizing your phone’s background, or creating a personalized greeting card.
In summary, an iPhone photo cutout can be useful in a variety of projects and situations where a transparent or isolated image is needed.
When you need to remove distracting elements from a photo, there are a few methods you can use to achieve a cleaner, more focused image. Our use of the following techniques can help:
Cloning: Cloning involves copying pixels from one part of an image to another, effectively erasing the distracting elements.
Healing: Healing is similar to cloning, but it blends the copied pixels with the surrounding area for a more natural result.
Masking: Masking involves using a masking tool to selectively remove or hide elements of an image.
Cut Out: A cut out, also known as isolation, involves removing the background of an image to create a transparent or isolated subject.
These techniques can be performed using photo editing software, either on your computer or with a mobile app on your iPhone.
By removing distracting elements from a photo, our focus can remain on the subject, making the image more impactful and professional-looking.
As a business owner, it can be challenging to keep up with the demands of running a company and still have time for important tasks like photo editing.
Fortunately, our team of clipping path experts can serve as your virtual assistant and contribute to the success of your business.
By outsourcing photo editing tasks to us, you can free up valuable time and focus on other important aspects of your business.
Our clipping path experts use advanced techniques, such as clipping paths, to remove the backgrounds of your images and create transparent backgrounds, ensuring that your products are presented in the best possible light.
In addition, our team is highly skilled and efficient, allowing us to complete tasks quickly and accurately, ensuring that you receive the highest-quality results.
With our help, you can present your products in a professional and eye-catching manner, helping you to stand out in a crowded market and attract more customers.
So why not take advantage of our expertise and allow us to contribute to the success of your business as your virtual assistant? Contact us today to learn more about our services and how we can help you.
A clipping path expert is a professional who uses advanced techniques to remove the background of an image and create a transparent background.
Our clipping path expert team utilizes the clipping path technique, which involves tracing around the subject of the image and separating it from the background.
The result is an image with a transparent background that can be used in a variety of ways, such as on websites, product packaging, or in advertisements.
By removing the background of an image, our experts can help you present your products in the best possible light and make them stand out.
In addition to removing the background, our experts can also make other necessary edits to your images, such as color correction, resizing, or adding shadows.
The result is a polished, professional-looking image that will help your products stand out and attract more customers.
So if you want to transform your images and take your business to the next level, let our team of clipping path expert’s help.
Choosing a clipping path expert for your image editing needs can provide numerous benefits for your business.
Our clipping path expert team members have the skills, knowledge, and experience to deliver high-quality results in a timely and cost-effective manner.
One of the main benefits of using our services is that we use advanced techniques, such as clipping paths, to remove the background of your images and create transparent backgrounds.
This allows you to present your products in the best possible light and make them stand out in a crowded market.
In addition, our team is highly efficient and dedicated to providing excellent customer service. We understand the importance of meeting your deadlines and delivering the results you need to succeed.
Our goal is to help you achieve your goals and grow your business through high-quality image editing.
So if you want to take your business to the next level and achieve professional results with your images, choose a clipping path expert like our team.
The best time to use clipping path expert services is when you need to remove the background of your images and create a transparent background.
Our team of experts can help you achieve professional results in a timely and cost-effective manner.
In addition to removing backgrounds, our services can also be used for other image editing needs, such as color correction, resizing, or adding shadows.
Whether you are creating product images for your website, packaging, or advertisements, our team can help you present your products in the best possible light.
Another great time to use our services is when you need to make a large number of images, but you don’t have the time or resources to do it yourself.
Our team can handle large volumes of work, so you can focus on other aspects of your business.
So if you want to achieve professional results with your images and make your products stand out, the best time to use clipping path expert services is now.
Clipping path expert services can elevate the look of your product photos. Our team can use advanced techniques, such as clipping paths, to remove distracting elements and create transparent backgrounds, allowing your products to shine.
Our experts can also enhance the overall quality of your images with color correction, resizing, and shadows. These small tweaks can have a big impact on how your products are perceived by customers.
By working with a clipping path expert like us, you can ensure that your product photos are professional and eye-catching, leading to increased customer engagement, improved brand image, and ultimately, increased sales.
Invest in the quality of your product photos and take your business to the next level with our clipping path expert services.
Outsourcing clipping path services can bring numerous benefits to your business. Our team of experts can handle the tedious and time-consuming task of image editing, freeing up valuable time and resources for other important aspects of your business.
Working with a clipping path expert & our outsourcing service like us also ensures that you receive high-quality results.
Our team uses advanced techniques and has years of experience, ensuring that your images are transformed into professional, eye-catching pieces.
Outsourcing also offers cost-effectiveness. Our competitive pricing and bulk discounts allow you to save money compared to hiring in-house staff or investing in expensive software and equipment.
Another advantage of outsourcing your clipping path services is scalability. Our team can handle a large volume of work and can accommodate your changing needs as your business grows.
By choosing our clipping path expert outsourcing services, you can achieve improved image quality, save time and money, and have the peace of mind of knowing that your image editing needs are in capable hands.
Photo lighting editing is the process of adjusting the brightness, contrast, and color balance of an image to enhance its overall look and feel.
Our clipping path expert uses advanced tools and techniques to correct any lighting issues, resulting in images that appear natural and professional.
Good lighting is a key factor in making an image look attractive and eye-catching, and it can greatly impact how a photo is perceived.
Our photo lighting editing services can bring out the best in your images, whether it be to brighten up a dull photo or to bring out the details in an overly dark image.
Our team of experts can also add special effects, such as reflections and shadows, to give your images an extra touch of professional quality.
These effects can greatly enhance the visual impact of your images, making them stand out from the crowd.
Invest in the quality of your images and elevate your brand with our photo lighting editing and clipping path expert services.
Photo lighting editing is crucial for producing high-quality images that accurately represent your brand and products. Poor lighting can detract from the overall quality of an image, making it less appealing and less likely to grab the viewer’s attention.
By using our photo lighting editing services, you can ensure that your images are properly lit and free from any distracting lighting issues.
Our team of clipping path experts uses advanced techniques to correct any lighting issues and bring out the best in your images, resulting in images that appear natural and professional.
Good lighting can also greatly impact the mood and feel of an image. Our team can adjust the lighting to match the desired mood and tone, whether it be a bright and cheerful feel or a more dramatic and moody look.
In today’s digital age, images are an integral part of your brand’s online presence. Investing in the quality of your images with our photo lighting editing services can help set your brand apart and make a positive impact on your target audience.
Photo lighting editing is necessary in many different scenarios where the lighting conditions are not ideal.
This can include outdoor photos taken on a cloudy day, indoor photos with harsh shadows or uneven lighting, and product photos that need to look their best for online sales.
Our clipping path expert service for photo lighting editing services can also be helpful in correcting lighting issues in images taken in low light conditions, such as at events or in dimly lit rooms.
In these situations, it can be difficult to achieve the desired lighting balance without professional editing.
Moreover, lighting can also greatly impact the mood and feel of an image. By using our photo lighting editing services, you can ensure that the lighting in your images accurately reflects the desired mood and tone, whether it be a bright and cheerful feel or a more dramatic and moody look.
Photo lighting editing is necessary for any image where the lighting conditions are not ideal, or where the lighting needs to be adjusted to match the desired mood and tone.
With our professional photo lighting editing clipping path expert services, you can ensure that your images are properly lit and look their best.
Our photo lighting editing clipping path expert services are designed to help a wide range of individuals and organizations enhance the quality of their photos.
For professional photographers, our services can take their images to the next level by adjusting lighting to create stunning and impactful visual storytelling.
E-commerce businesses can also benefit from our services, as well-lit product photos can attract more customers and increase sales.
Even individuals who are passionate about photography and want to capture memories in the best light possible can use our tools to achieve their desired results.
With our photo lighting editing capabilities, anyone looking to improve the quality of their photos can benefit from the use of our services.
Photo lighting editing is an essential element in creating stunning photographs. Proper lighting can enhance the mood, bring out details, and create depth and dimension in an image.
However, not all photos are taken in ideal lighting conditions, and often, some adjustments are needed to make the photo look its best.
Photo editing software can help you adjust the lighting in a photo, allowing you to increase or decrease the brightness, adjust the color temperature, and fine-tune the lighting to make your photos look their best.
In this guide, we’ll walk you through the step-by-step process of editing photo lighting, so you can make your photos stand out.
Before photo lighting editing clipping path expert services we must concentrate on some important issues to edit the photo lighting editing properly as a beginner photo lighting editor.
Here is a step-by-step guide on how to edit photo lighting:
» Open your photo editing software, such as Adobe Photoshop or Lightroom.
» Import the photo that you want to edit and create a new adjustment layer.
» In the adjustment layer, select the “Exposure” or “Brightness/Contrast” option.
» Adjust the sliders to increase or decrease the brightness of the photo until it looks the way you want it to.
» If the photo looks too warm or cool, adjust the color temperature by moving the “Temperature” slider.
» If the photo has dark shadows or bright highlights, adjust the “Shadows” and “Highlights” sliders to bring out more detail in those areas.
» Use the “Curves” or “Levels” adjustment to fine-tune the lighting, making it brighter or darker in specific areas.
» Once you’re satisfied with the lighting, save the edited photo as a new file.
Remember to always work on a copy of the original photo, so you don’t accidentally overwrite the original file.
Photo editing lighting is an essential aspect of creating beautiful and visually appealing photos.
However, when implementing lighting adjustments, there are several common mistakes to avoid.
Over-exposure, under-exposure, incorrect color temperature, unnatural shadows, and over-editing are some of the most common errors that can make photos appear unnatural or unappealing.
By being mindful of these mistakes and making subtle adjustments, you can enhance your photos’ lighting and make them stand out.
Here are some common mistakes to avoid when implementing photo editing lighting:
(1) Over-exposure: Over-exposure occurs when there is too much light in the photo, causing it to appear washed out and lacking in detail. To avoid this, be careful when adjusting the brightness and exposure settings, and check your histogram to ensure you’re not losing detail in the highlights.
(2) Under-exposure: Under-exposure is the opposite of over-exposure, where the photo is too dark and lacking in detail. To avoid this, adjust the exposure and brightness settings, and check the histogram to ensure you’re not losing detail in the shadows.
(3) Incorrect color temperature: The color temperature of a photo can have a big impact on the overall feel and mood of the image. If the color temperature is too cool or too warm, it can make the photo appear unnatural or unappealing. Be careful when adjusting the color temperature and try to keep it consistent with the lighting in the original scene.
(4) Unnatural shadows: When adjusting the lighting in a photo, it’s important to be mindful of the shadows, as they can add depth and dimension to the image. Avoid making the shadows too dark or too light, as this can make them appear unnatural.
(5) Over-editing: It’s easy to get carried away when editing a photo, but it’s important to remember that less is often more. Avoid over-editing the photo by making subtle adjustments and taking breaks to come back with a fresh perspective.
By avoiding these common mistakes, we can ensure that your edited photos look natural and appealing with the clipping path expert services.
A clipping path is a technique used in image editing to remove the background of an image or to isolate an object from its background. To become a professional clipping path expert, here are some guidelines to follow:
Learn the Basics: Start by learning the basic principles of image editing and clipping path techniques. Familiarize yourself with the various tools, including the Pen Tool, Lasso Tool, and Magic Wand Tool, which are commonly used in clipping paths.
Choose the Right Software: You’ll need image editing software that supports clipping paths. Adobe Photoshop is the most popular and widely used software for this purpose. Learn how to use the software and its various features.
Practice, Practice, Practice: The key to becoming an expert in the clipping paths is to practice as much as possible. Practice with different types of images, backgrounds, and objects. This will help you develop your skills and increase your speed.
Keep up-to-date with Trends and Techniques: Stay updated with the latest trends and techniques in the field of clipping path. Follow blogs, forums, and social media pages related to image editing and clipping path.
Attend Workshops and Courses: Attend workshops and courses related to image editing and clipping path. This will help you learn from experts and get hands-on experience.
Build a Portfolio: Create a portfolio of your best work to showcase your skills and expertise. This will help you attract clients and build your reputation as a professional clipping path expert.
Provide Excellent Customer Service: Providing excellent customer service is key to building long-term relationships with clients. Respond promptly to client inquiries, be professional and friendly, and deliver high-quality work on time.
By following these guidelines and continuously improving your skills, you can become a professional clipping path expert.
A guideline on how to build a better clipping path expert services company! Here are some steps you can follow:
Identify your target market: The first step in building a successful clipping path expert services company is to identify your target market. Consider who your potential customers are, what they need, and what they’re willing to pay for your services. This will help you create a marketing strategy that effectively reaches your target audience.
Define your services: Clipping path services can include image cutouts, background removal, color correction, retouching, and more. Clearly define the services you’ll be offering so that customers know exactly what they can expect from you.
Invest in the right software and tools: To provide high-quality clipping path services, you’ll need to invest in the right software and tools. This may include Adobe Photoshop or other image editing software, graphics tablets, and other hardware.
Hire skilled professionals: Building a skilled team is essential for providing high-quality clipping path services. Look for professionals with experience in image editing and graphic design, and provide ongoing training to keep their skills up-to-date.
Offer competitive pricing: Pricing is an important factor for customers when choosing a clipping path expert services company. Research the pricing of other companies in the industry and ensure that your pricing is competitive while still allowing for a profitable business.
Provide excellent customer service: Providing excellent customer service is crucial for building a successful clipping path expert services company. Be responsive to customer inquiries and concerns, and work to build long-term relationships with your clients.
Focus on quality: Quality should be at the core of your business. Ensure that your team delivers high-quality clipping path services consistently, and focus on continuously improving your processes and services.
Develop a strong brand: Building a strong brand is essential for standing out in the crowded marketplace of clipping path expert services. Develop a memorable logo and brand identity, and create a website and social media presence that showcases your services and expertise.
Market your services effectively: To grow your business, you’ll need to market your services effectively. Use a mix of online and offline marketing tactics, including search engine optimization, social media advertising, and attending industry events and trade shows.
Continuously improve your services: The industry of clipping path services is constantly evolving, and it’s important to stay up-to-date with the latest techniques and technology. Continuously improve your services to stay competitive and meet the changing needs of your customers.
I hope this guide helps you build a successful clipping path expert services company!


One comment
Michel
February 17, 2023Best best background remover online free service apps: https://www.remove.bg/