
Making image backgrounds transparent is one of the most popular Photoshop processes. Photoshop has a number of tools that can be used for this. Depending on the output needs and image quality, there are both easy and complicated ways to go about it. I’ll attempt to describe one of the easiest methods for creating a transparent background for a photo in Adobe Photoshop in this article.
Transparent graphics are needed in a lot of locations. We can use any background to place your photo thanks to it. It can be positioned on a dynamic background that changes color on its own. Consider a responsive website where web pages adjust to the size of various displays. In that case, you must adjust the photo background’s size to meet the available screen space. This is one special justification for making a picture translucent. There are numerous additional situations in which a transparent backdrop image is necessary.
1. Make your image with a layered image
2. Make a selection of an image
3. Create a path of an image with the Photoshop pen tool
4. Create a mask to bring the best result for dynamic background change
In Photoshop, an image is typically locked when we open it. To prove that, take a look at the picture below. It signifies the image is locked; in order to begin working on it, you must first unlock the image. Normally, you can unlock an image by double-clicking on it.
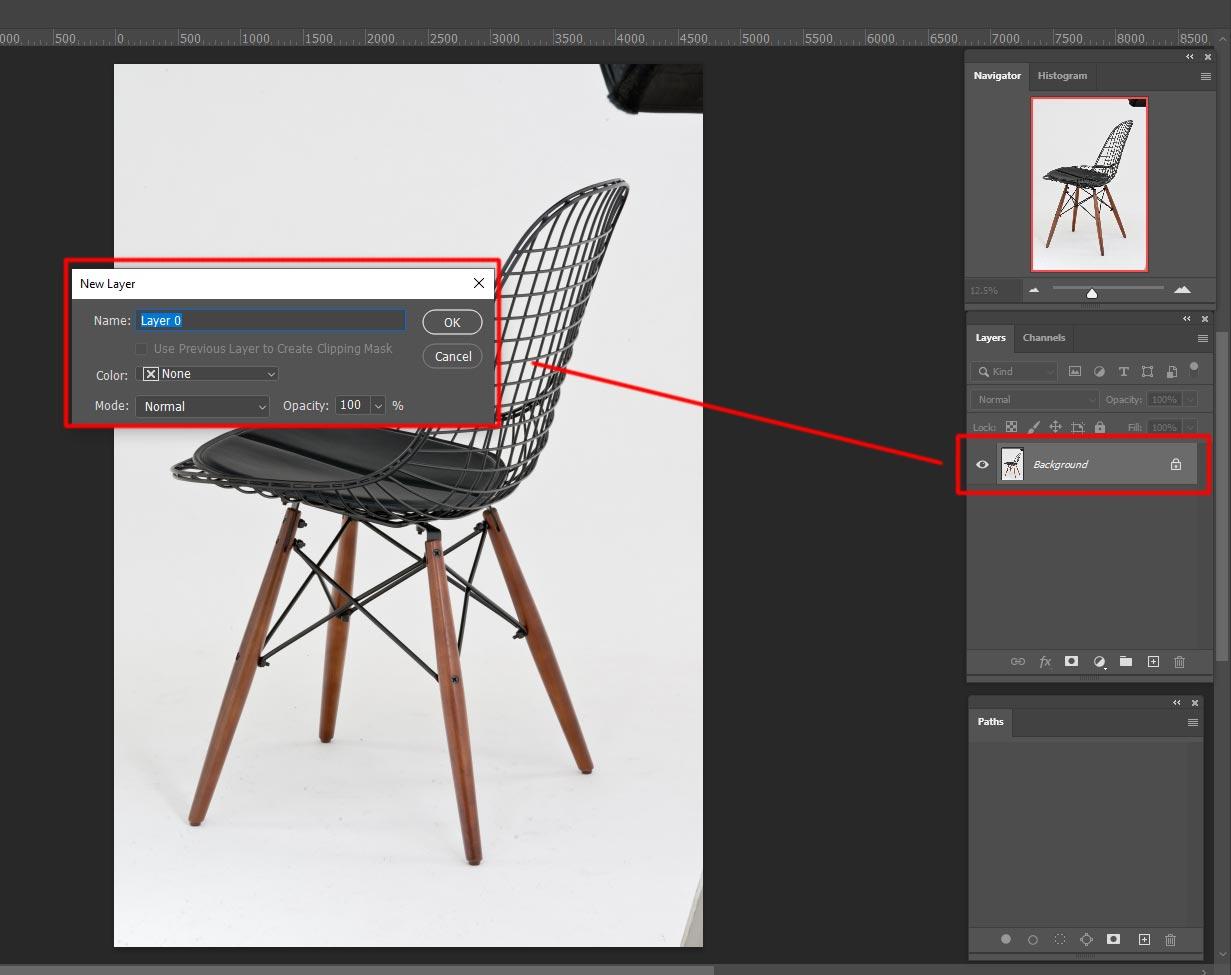
In Photoshop, an image is typically locked when we open it. To prove that, take a look at the picture below. It signifies the image is locked; in order to begin working on it, you must first unlock the image. Normally, you can unlock an image by double-clicking on it.
There are multiple techniques for selecting an area of an image, but the most popular selection method is the “Pen tool.” The most popular and exact tool in Photoshop for making ideal selections is the Pen tool.
There are more options accessible there in addition to the “Pen tool,” which may be selected by pressing the letter “P” on the keyboard. So, when you see the pen tool selected, just like in the image, you must also click on the first choice.
The selection procedure has now started. Bring the path palette from the “Window” Panel before making a selection on the image.
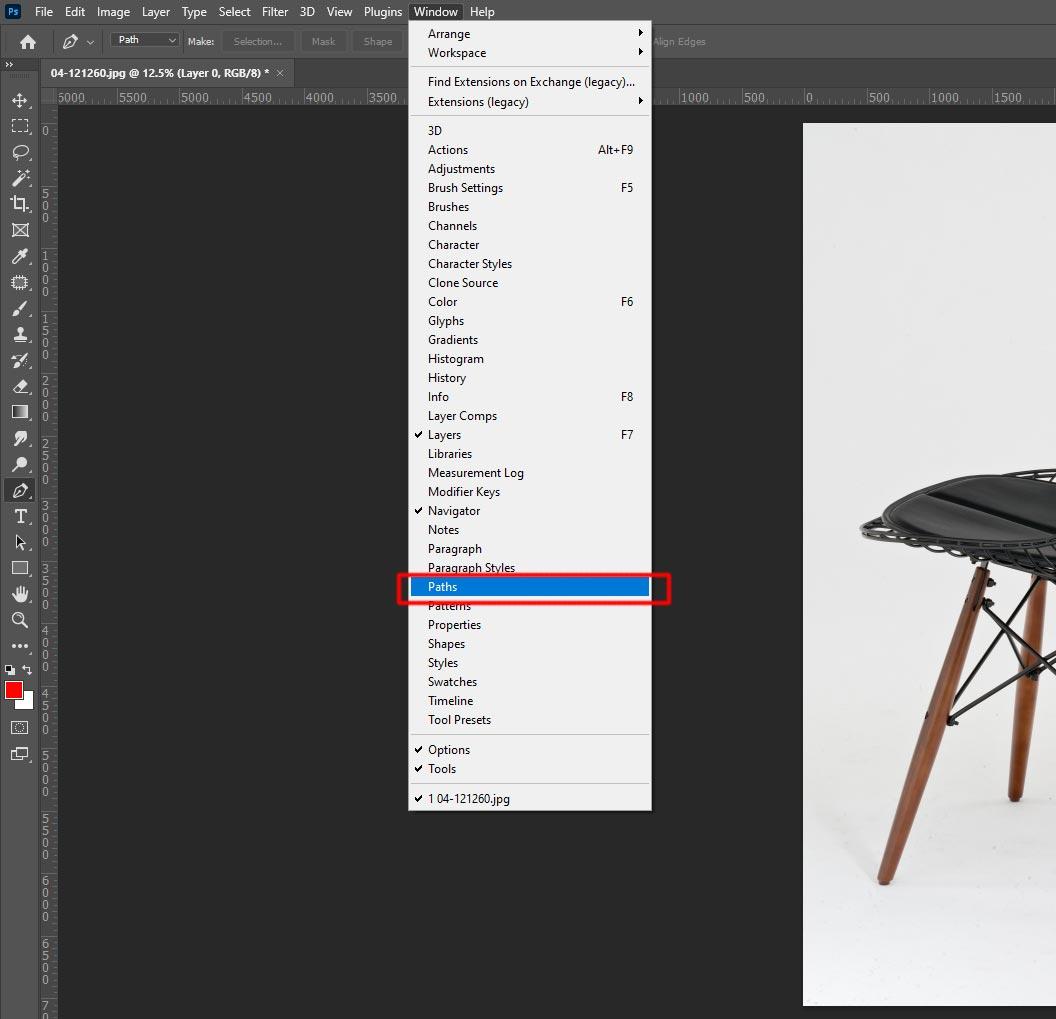
You must select the ‘Paths’ option from the drop-down list with the checkmark not present. You must click on it to check it if it is not already checked. For an example, take a look at the picture below.
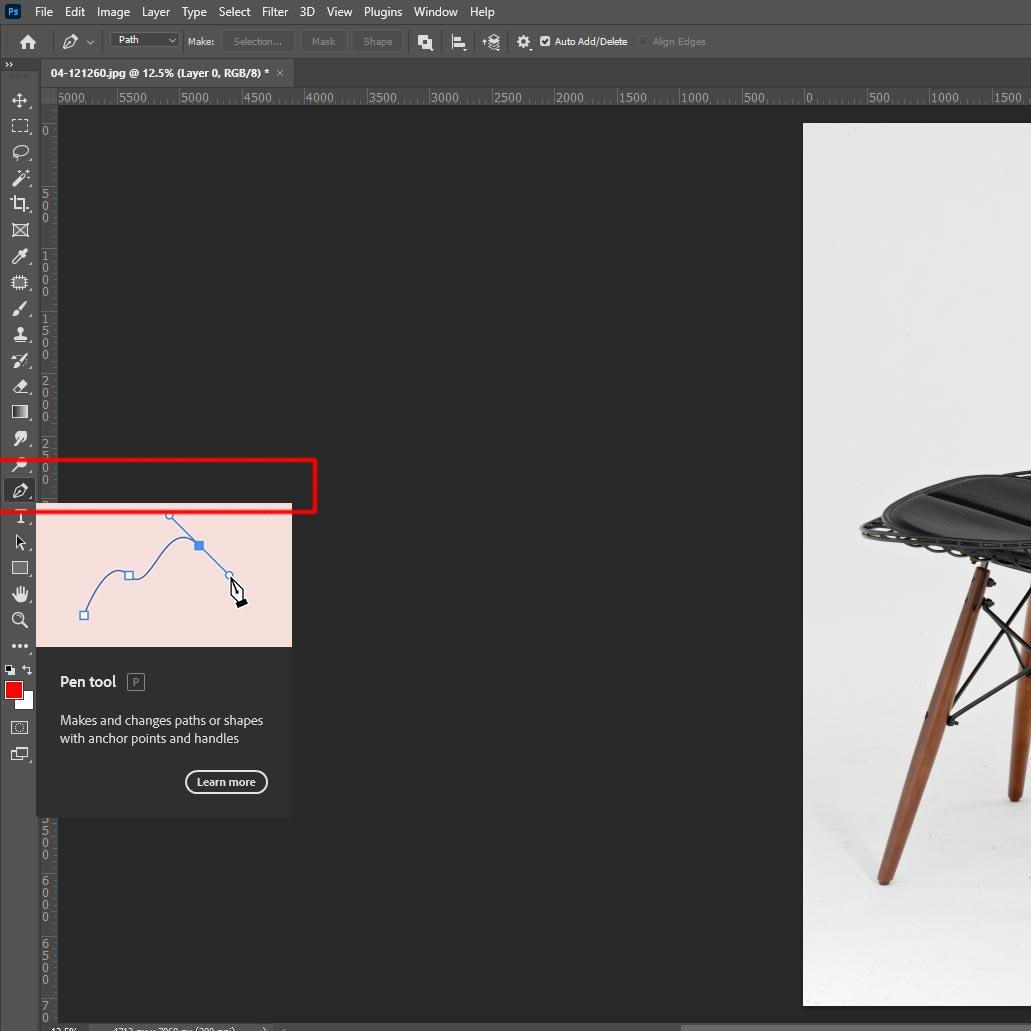
When we ensure the path option selected under the window path feature and then open the path panel like below image
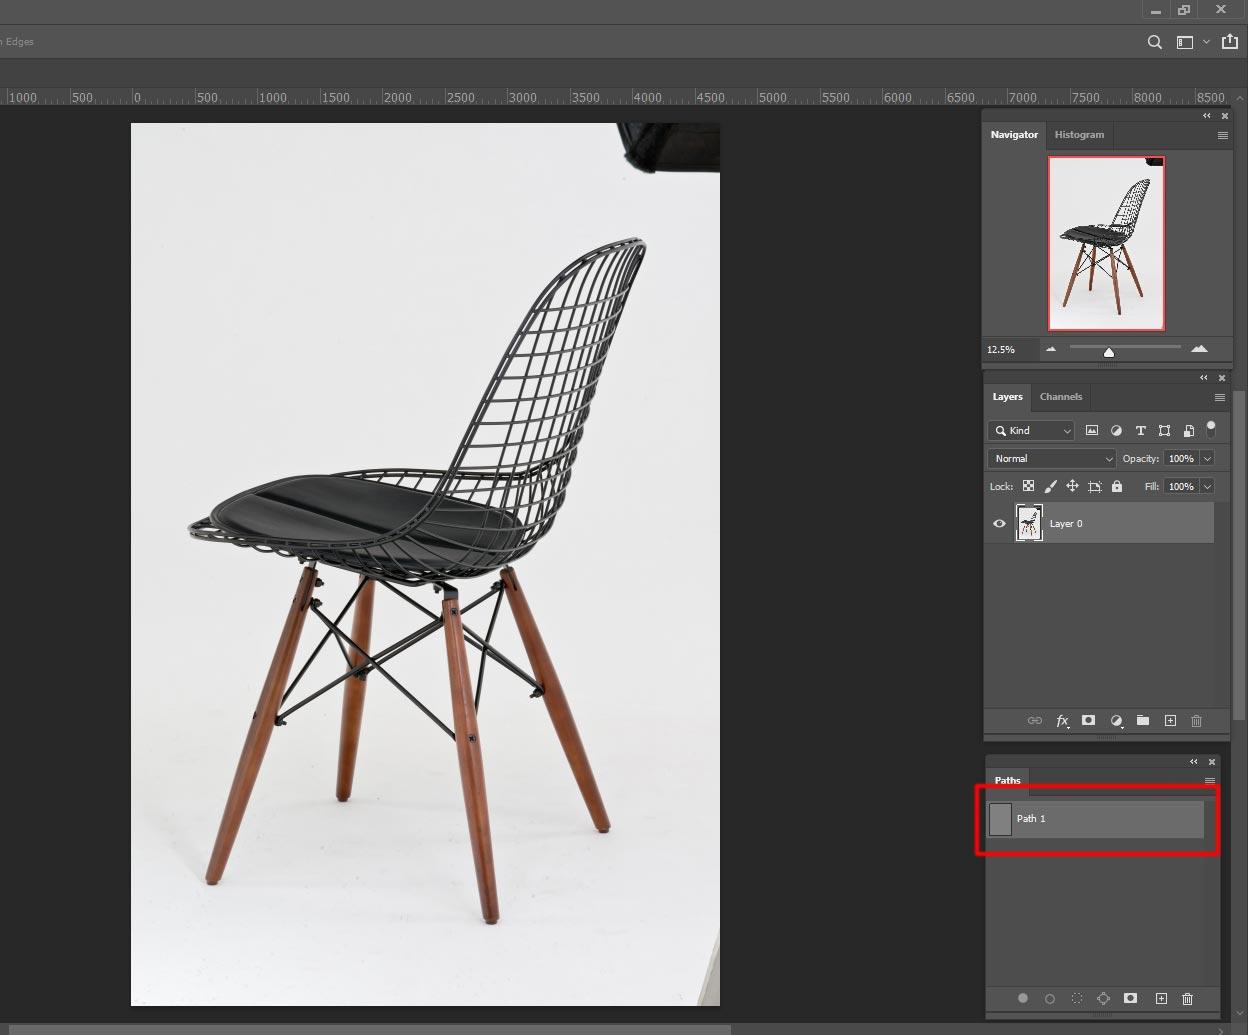
Start path with the Photoshop pen tool to select the image like this image below
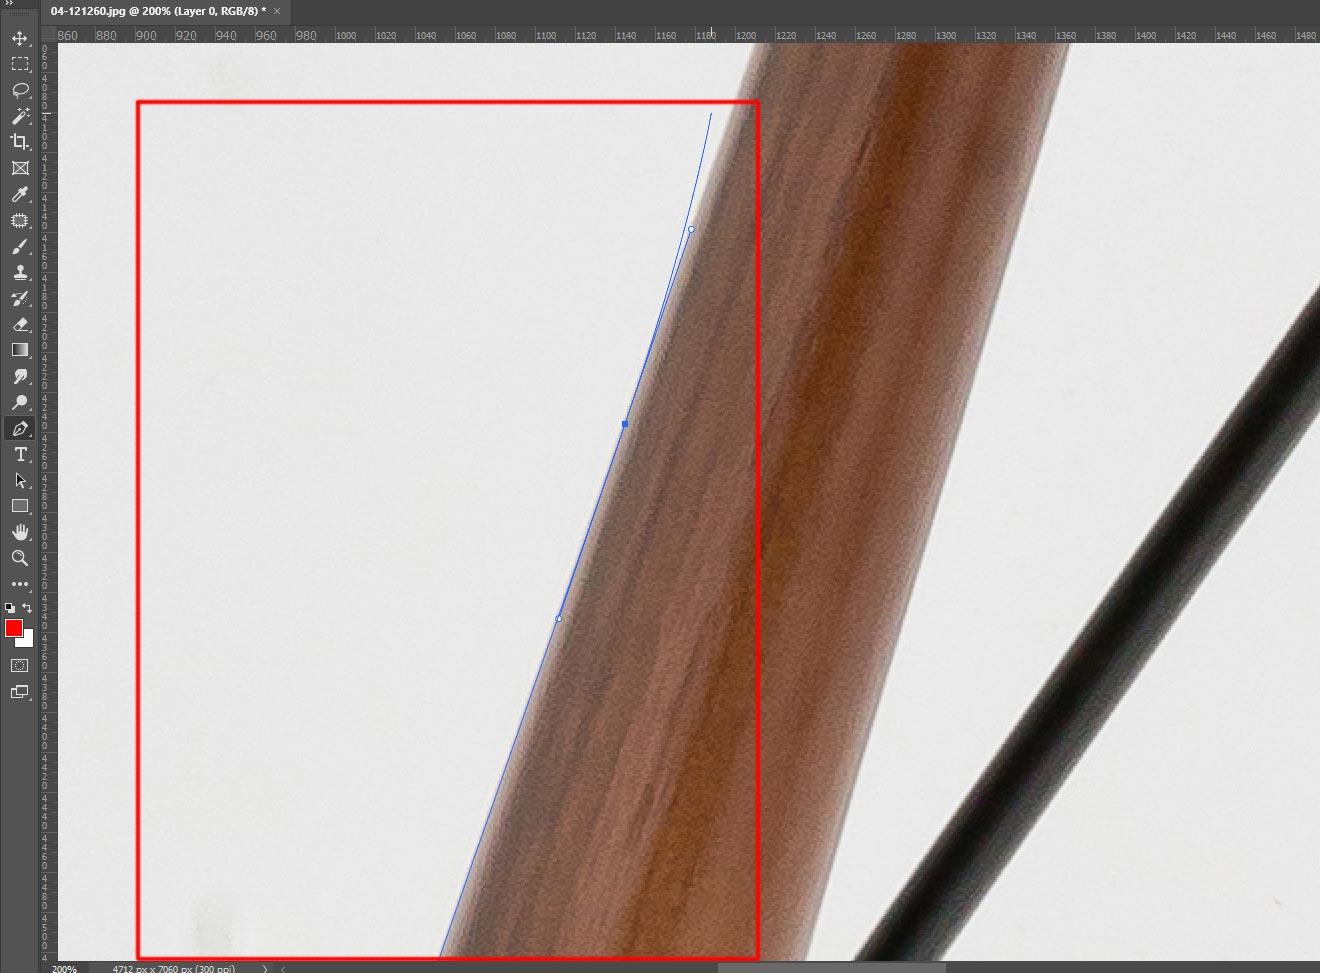
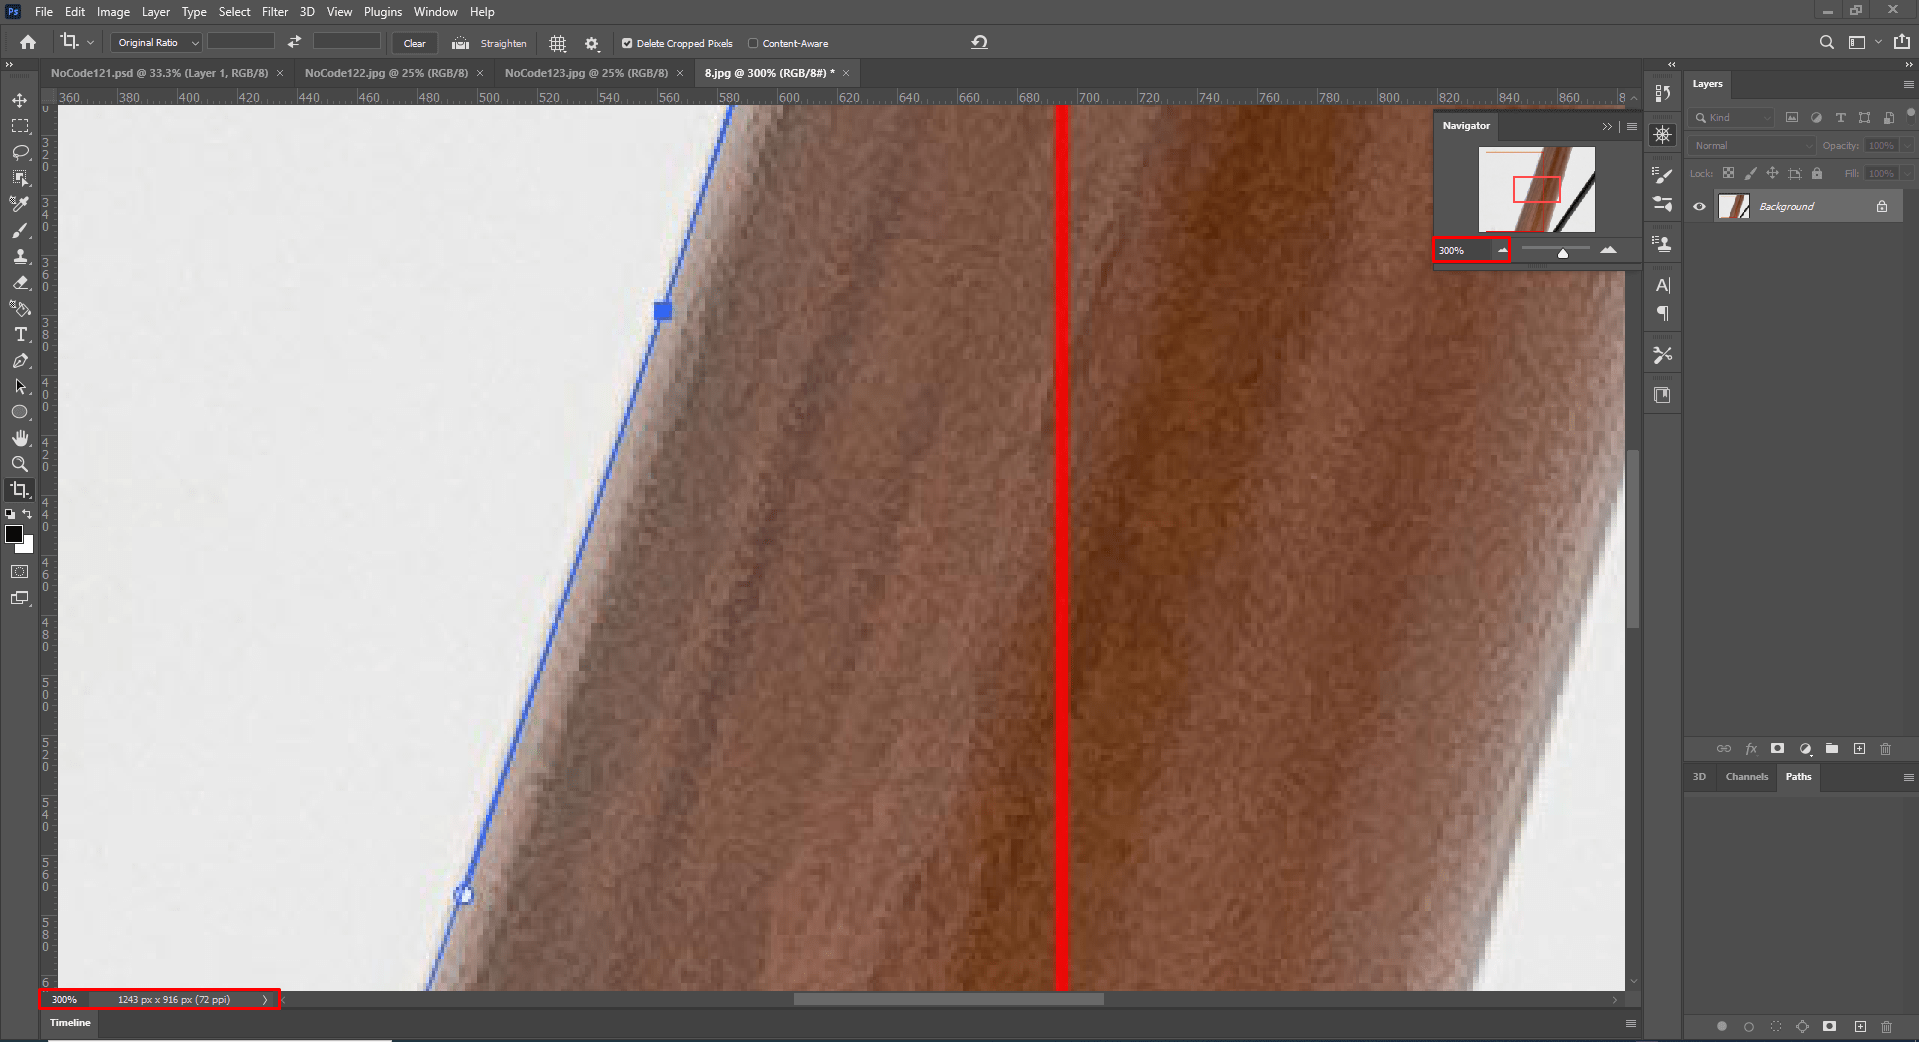
It is essential that you zoom in on the image as much as you can. The usual is 300 percent. In this technique, the image will be significantly larger and your choice will be good. Your choice doesn’t have to be perfect because it is now simpler for you because you made it wider. You can see the change in the image when you zoom out.
Look at the window’s left-bottom side. Where the screen’s current status is visible. Simply press “Control and +” to increase the screen size and “Control and -” to decrease it. Additionally, by double-clicking on the text after selecting it, you may directly write the screen size in percentage. Look at the % when you adjust the window size.
You can now start making a path on your image. To make a path, you can start anywhere in the image. By clicking all around the image, you can choose it completely. After completing all of your selections, you must rejoin the path you started making at the beginning.
It’s difficult to create paths. To make the best choice, you must practice it as much as you can. For example, you must consider the forward path angle when curving the path. It will assist you in making the decision simple due to the upcoming election.
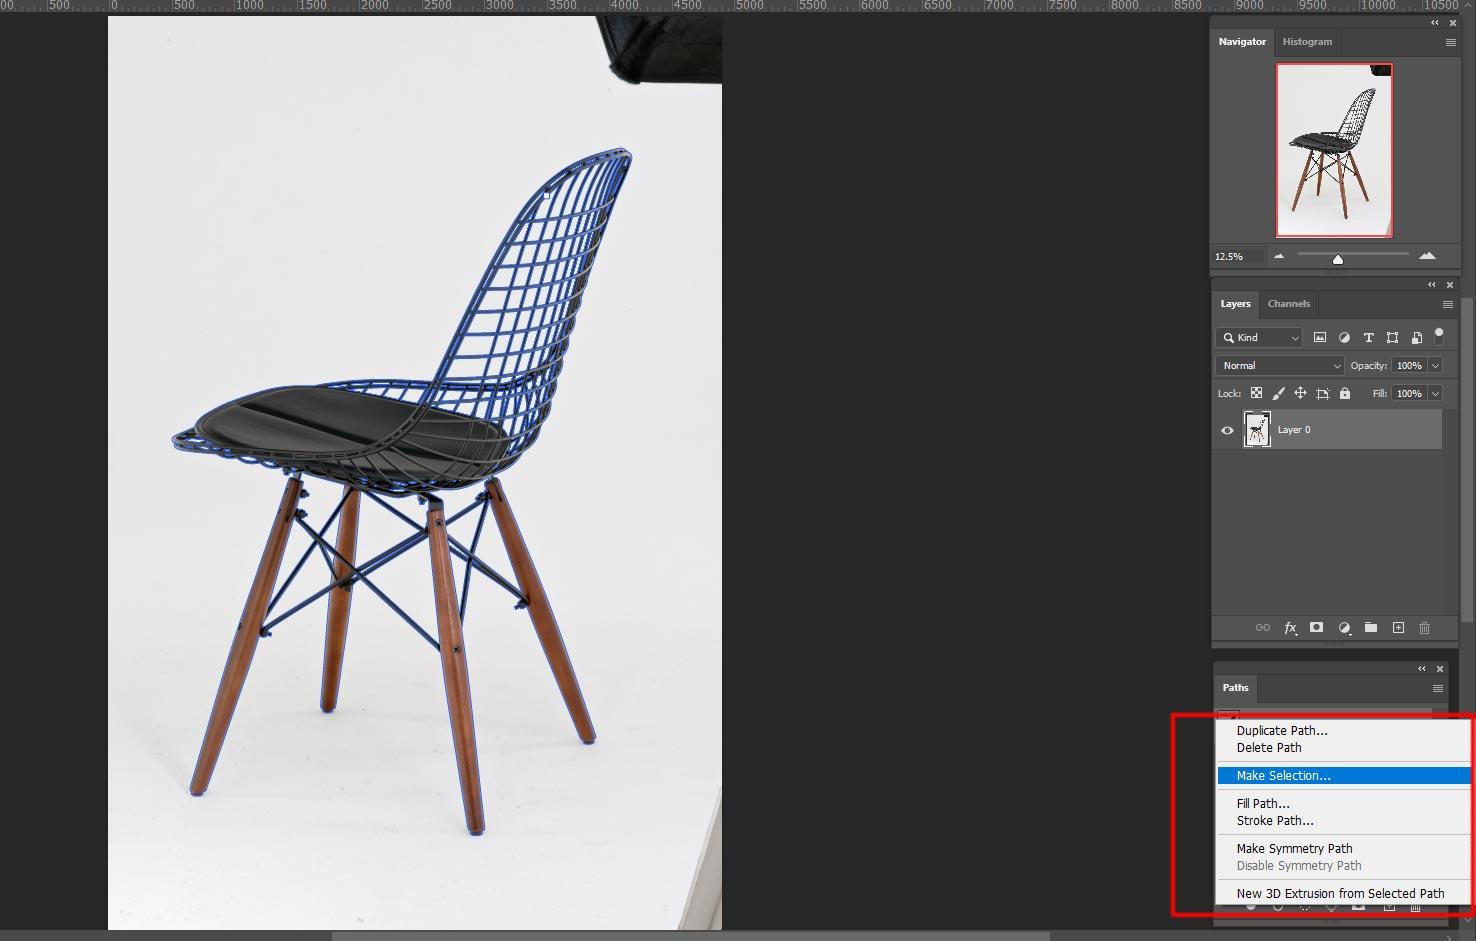
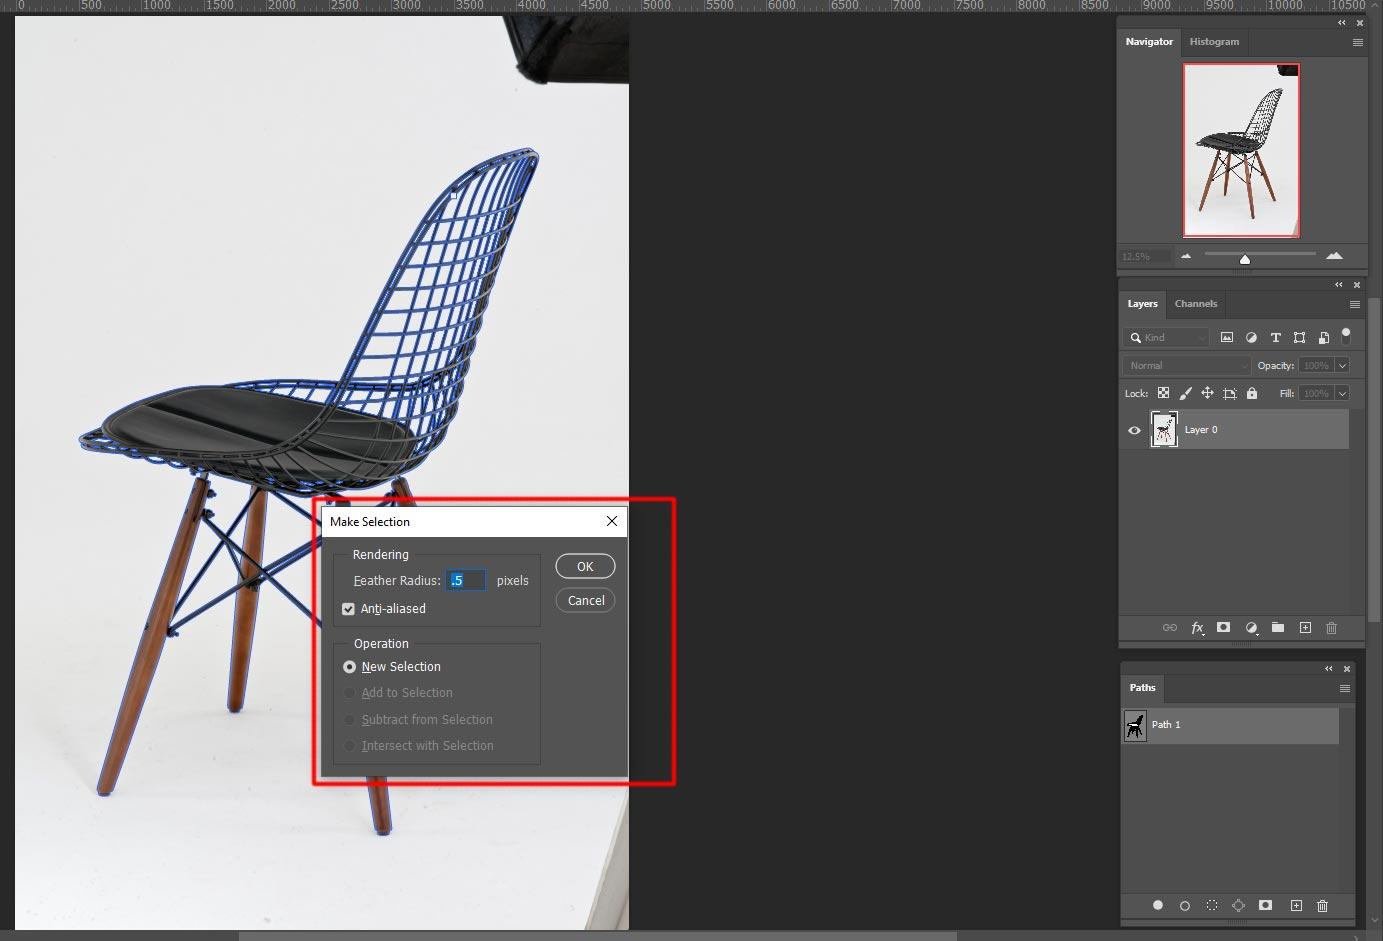
You must return to the Path panel after joining the path from your starting point. Click “Make Selection” from the context menu of the right-clicked “Path 1” A pop-up window will then appear where you can enter a feather value, such as 0.2 or 0.3 percent, to slightly obscure the selection. Your cut-out outcome will be more valuable and genuine if you follow this procedure.
The last step is now. Simply select “Add layer mask” from the “Path panel” to proceed.
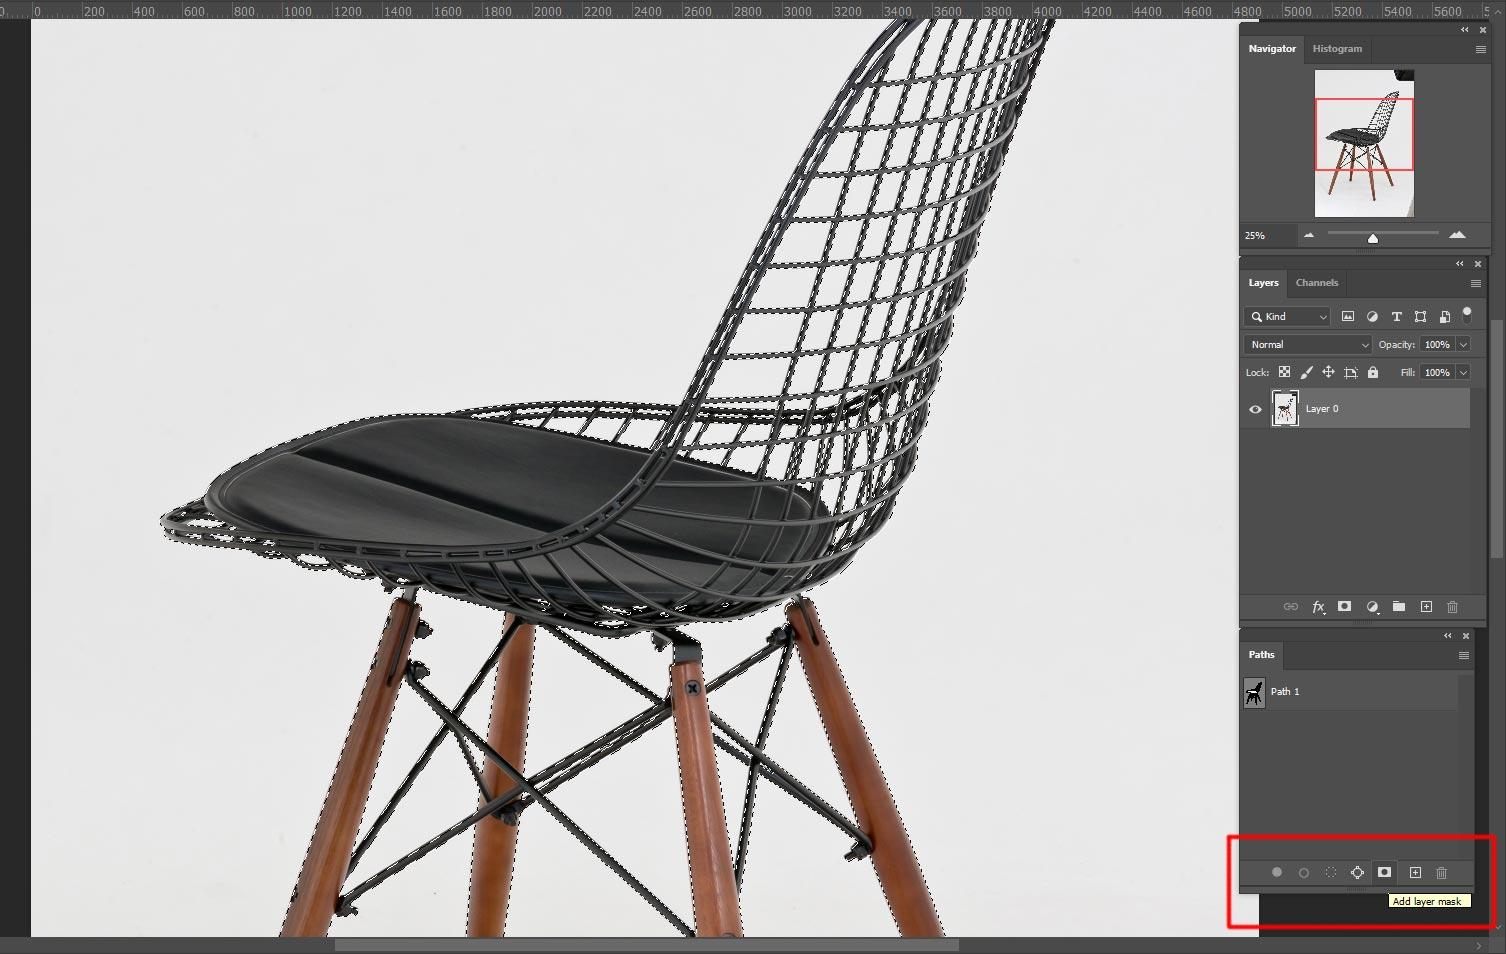
Simply selecting “Add layer mask” allows you to observe the miracle. The background of your picture will be totally transparent.
You may now change or add a new background to any color for the image very easily after creating transparency using the process described above. The icon below can be found in the “Layer panel,” which you should access.
There is a button that says “Create new fill or adjustment layer” if you move your cursor over it.
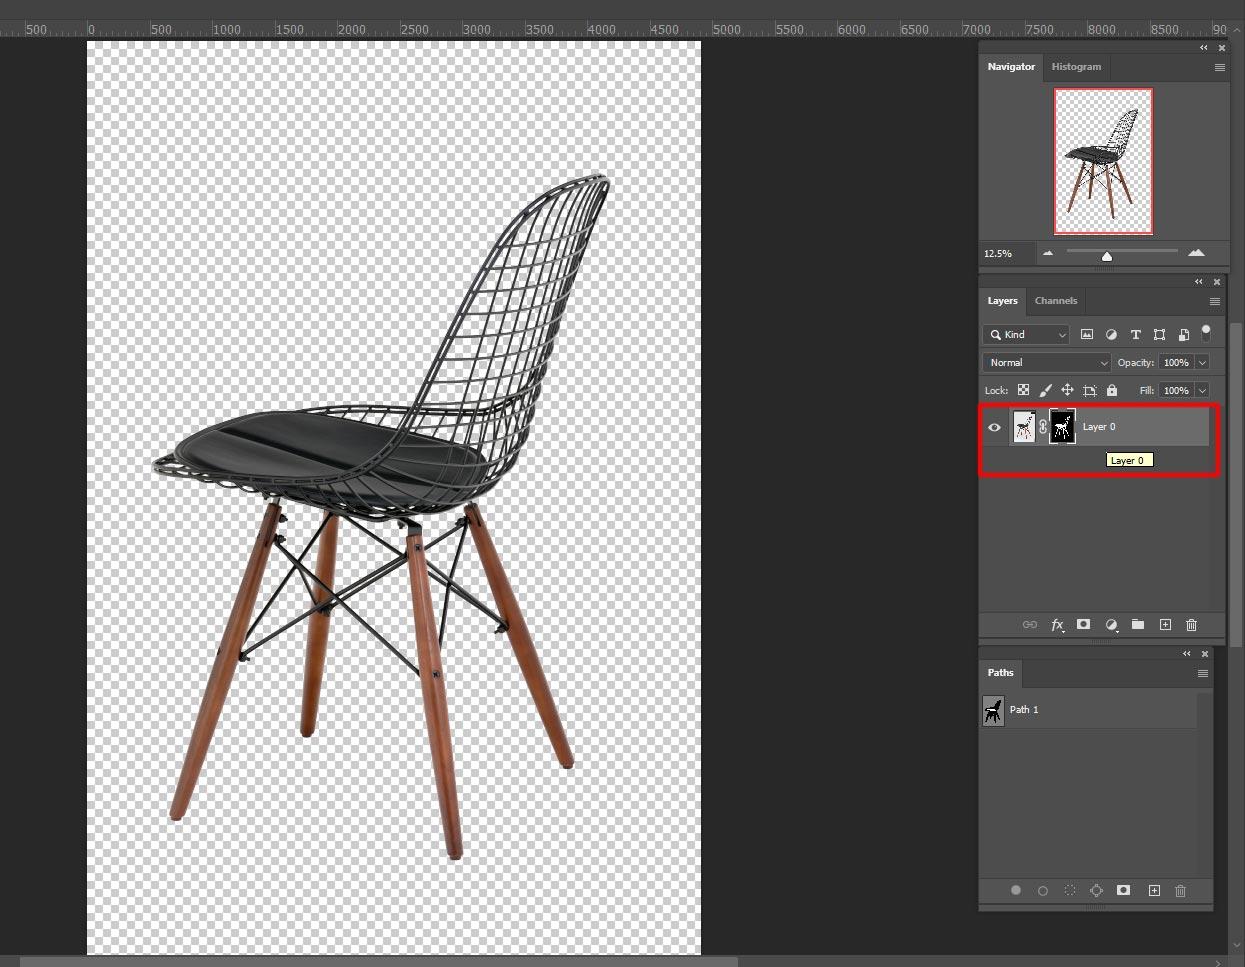
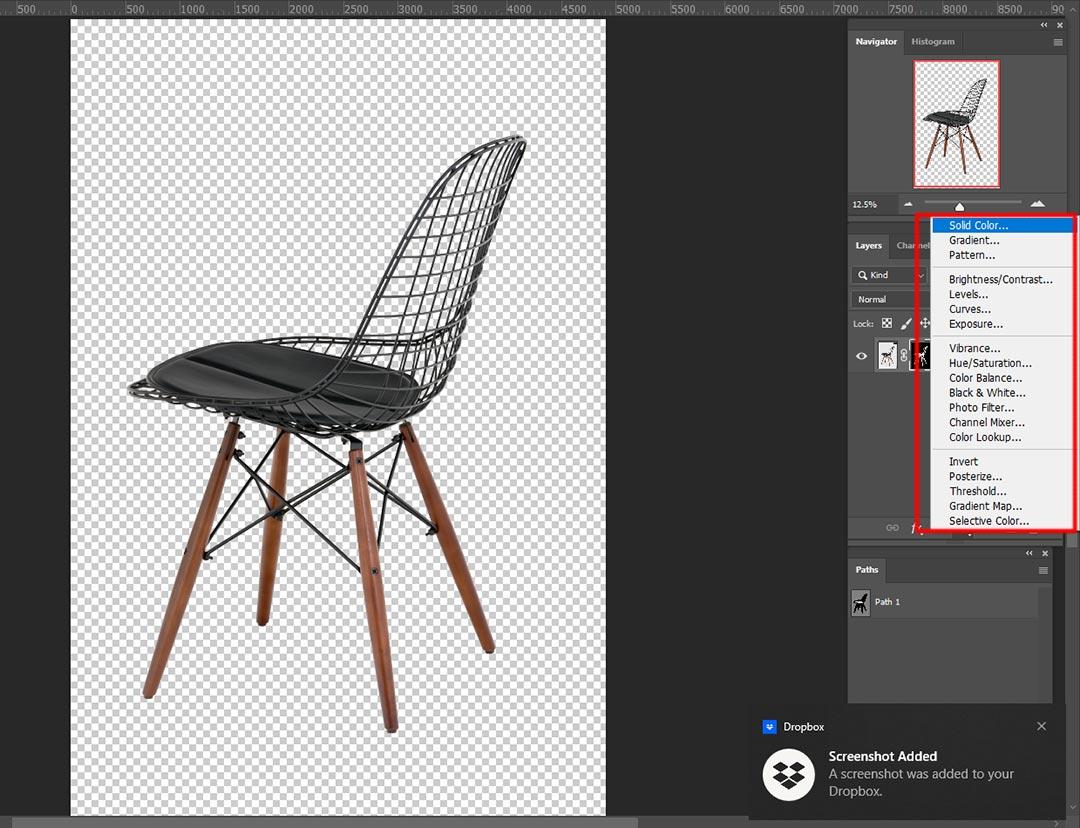
After you click the icon, a drop-down menu will open up. The ‘Solid Color’ option must be selected from the drop-down list.
When you select the “Solid Color” option, a pop-up window that allows you to select any color will open. When you select a color, a new layer is automatically added on top of the picture layer you created at the start of the total work process. Simply press the “OK” button at this point.
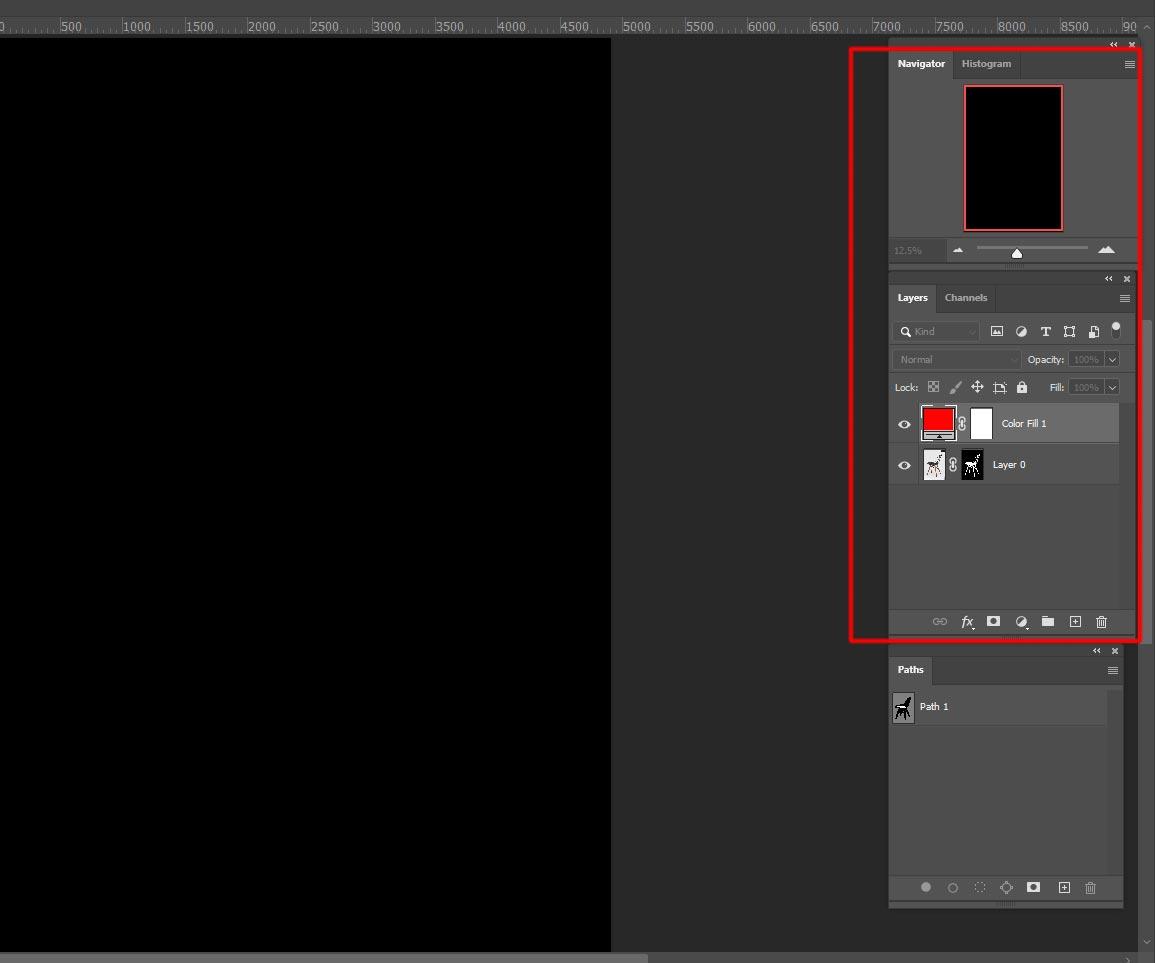
When you select the “Solid Color” option, a pop-up window that allows you to select any color will open. When you select a color, a new layer is automatically added on top of the picture layer you created at the start of the total work process. Simply press the “OK” button at this point.
As an image editing service provider company, the Clipping Path Agent (CPA) provides services on image compression, cropping, resizing, and optimization at very affordable prices.
Not only image optimization and compression services we offer all image editing services according to your needs such as below.
Dear readers,
Thank you for taking the time to read my latest blog post. I hope you found it interesting and informative. I am reaching out today to invite you to share your opinions and thoughts in the comments section below.
Do you agree with my point of view? Have you had similar experiences? Is there anything you feel I should have covered or addressed more fully? Whatever your thoughts, I would love to hear them.
Your comments help me to improve the quality of my content, and I appreciate your willingness to engage with me and with other readers. Let’s keep the conversation going and learn from each other.
Lastly, I want to create a respectful and welcoming environment in the comments section. Please treat each other with kindness and respect, and let’s keep the discussion focused on the topic at hand.
Thank you for being a part of my community, and I look forward to hearing from you.